
Create Clipped Animation
Step-by-step instructions of how to create a simple animation from a series of still images.
In this instance, multiple sets of eyes and mouths are being used in a projection mapping project. The final output elements need to be octagonal with a small gradient fade around the edges and grouped together as sets before becoming an animation. The Illustrator files are being created with CC 2018, but all of the steps should work going back to at least CS5. This also requires Apple Keynote, which is a Mac-based app. If you don’t have a Mac or prefer to use another option for create the sequence, steps 1-4 still can be used for generating the clipped images.
Step 1: Illustrator File Setup
To get the desired effect we first need to create an Illustrator template that has the following parameters:
- width = 1500px
- height = 500px
- landscape orientation
- RGB Color Mode

Next we create the following layers:
- Alignment Guides: top layer guide for the center of each element area (i.e.: center of eye or mouth)
- Gradient Masks: these elements fade the edges of each octagon
- Clipping Paths: basic octagons for this project, to be used as clipping paths
- Imported Images: each face imported
- Artboards: temporary layer that contains a simple rectangle for each set to be converted into artboards

It’s vital to make sure that the initial layout is exactly as it needs to be before performing the next steps. For this project each final set is laid out side by side with the mouths in the center and the eyes flanking via the following steps:
- A simple rectangle is created on the Artboards layer sized exactly with the dimensions of our final output (1500px x 500px). All of the content needs to fit within this rectangle.
- A simple octagon is then created on the Clipping Path layer with the following dimensions (500px x 500px).

- Copy the octagon and then Paste in Front. Move this new item to the Gradient Masks layer.
- Set the gradient for the new octagon to Radial with both points as total black. The inner point position location of 75% and opacity set to 0%. Place the top gradient diamond to 85%.

- Now we create the alignment guides on the top layer by making a square, one vertical line and one horizontal line. Dimensions should be 500px each and then center all together both vertically and horizontally. Give all a 2pt stroke size and no fill. Now group together and center on octagons.

- Select both octagons and the guides (you can do this by holding down the shift key and clicking the selection target circles). I also recommend locking the Artboard layer temporarily to keep it’s content from accidentally being selected or moved.

- Now we use the Transform Effect option (via the menu: Effect > Distort & Transform > Transform…) with the following parameters: Move – 500 px, Copies – 2 (clicking Preview ON enables us to see the placement of additional copies) and then we click OK.
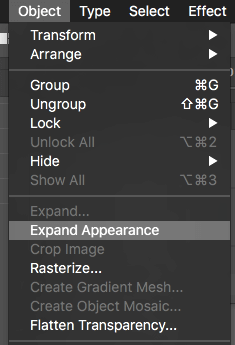
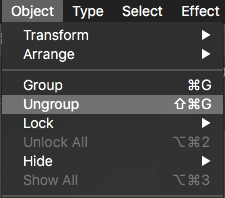
- We should now have three identical sets of octagons with guides, but they are still linked together. To separate them into individual elements, we select Expand Appearance from the Object menu, then Ungroup and Ungroup again. All of our elements are now created for this layout.
Step 2: Repeating Set Templates
Just as we used the Transform Effect option to create multiple instances of our main content, we can now use it to create several copies of our entire set via the following steps:
- Make sure that all layers are unlocked and that no individual items are locked by selecting Unlock All from the Object menu (it is dimmed if no items are currently locked).


- With all items unlocked, we click upon the center our single artboard and drag it to wherever we like (in this case, the upper lefthand corner).
- Now we can perform two more Transform Effect actions to create both rows and columns of our original artboard contents. Make sure that all content is selected before applying the effect. It doesn’t matter which effect is applied first in this instance.
- Now we again must select all content and Expand Appearance, Ungroup, Ungroup.
Step 3: Positioning
Each eye and mouth needs to be positioned, resized and rotated slightly using the guides to create a uniform set of eyes and mouths for the final animation. After each element is adjusted appropriately, the image can then be cropped using the clipping mask layer elements. To make this process easier, use the Locking options as follows:
- First we lock the following layers: Alignment Guides, Gradient Masks and Artboards.
- Here, we select the Imported Images layer so that when we add our content it all goes onto this layer.
- Content can be added by either using the File Menu > Place command or by dragging and dropping files directly onto the canvas.
- The best option here is to resize each item individually, centering by using the Alignment Guides. For this project, I start with one eye, resizing and centering it within one octagon and I then copy the resized image, moving it to the center the other eye and mouth, sequentially. The fastest way to do this is by holding down the OPTION or ALT key and then dragging the image to make a copy.

- We now select the clipping path above the individual element (eye or mouth) and the corresponding image below it. Choose Object Menu > Clipping Mask > Make.

- Once the element has been clipped, the best thing to do is to lock the item. The default keyboard shortcut for this is CMD 2 (CNTL 2) or Object Menu > Lock > Selection.
- We then repeat this process for every element, locking down each item to keep them from accidentally getting selected and/or moved.

Step 4: Exporting Image Sets
When everything is clipped, each artboard can be exported via the following process.
- All layers must be locked except for Artboards.
- Select All
- Object Menu > Artboards > Convert to Artboards – this makes the 1500 x 500 rectangles that we created in our initial setup into artboards for each set of elements.

- Now that every set is located on it’s own artboard we can export everything as whatever type of file is best by choosing File Menu > Export > Export As…
- In the export dialog box, we must make sure that the Use Artboards checkbox is selected. Multiple file formats are available at this point and for this project we are choosing PNG to maintain the transparency of our clipped items.

- If all went properly, we should have a directory full of 1500px x 500px rectangles with our project content.

Step 5: Sequencing
Now that we have our selection of perfectly sized content images, we can combine them together to create an animated sequence. Although there are a multitude of ways to generate transitions from individual files, I choose to use Apple’s Keynote application. It’s very simple to just create a master template that is the exact size of the PNG files and then drag and drop said files into the document. This creates a separate Keynote page for each file, with all content centered exactly and uniformly. Then we just select all pages at the same time and choose the transition animation and settings desired. Finally, we export the contents as a QuickTime movie, choosing the appropriate settings for the project.
- The first step in Keynote is changing the document Slide Size to our customized final output dimensions (1500px x 500px).


- We must also change the Master Slide, deleting all text fields and any other content so that it is only a black background.


- Now we just drag and drop all of our PNG files directly into the Keynote sidebar. They are added in order based upon the file names. This is where we can move them up and down to change the order if desired.
- We can now select all slides and apply the transition effects.
- The last step is to export the slideshow as a QuickTime movie file. We select the QuickTime option from the dropdown Export To menu.


After it finishes processing we have the following result…
Now our video is ready to be used in our project. In this instance, the video file is imported into projection mapping software where the individual octagons are projected independently onto photography umbrellas as part of a larger project. More details on this project are available here.
Review
As this process requires many steps, it can be easy to miss an item and as the majority of the work is accomplished in Illustrator, there is often more than one way to make something happen. If you have comments, questions or suggestions, please share them below in the forum. This is a live document, so changes may be incorporated based upon feedback.